
Methods and Techniques
One of the challenges of rephotography is to find and reach the camera location and view direction of the historic image. This process starts on a coarse scale e.g. finding out in which country, town and street a photo was taken and ends on a fine scale with an accuracy of centimeters. Depending on the composition of the scene even small differences between historic and rephotographic camera position can lead to foreground objects occluding different parts of the background.
On my application page different web applications helping in aligning the two camera position are available.Camera Localisation and Orientation
There are several possibilities to find the correct camera location and view direction: To get the rough location, of course content and annotation of the historic photograph can be used but also aerial and satellite as well as Google Street View are of help. Knowing the potential area or knowing a local can also be of help. If the rough location is known a printed copy of the original images can be taken there and the positioning of prominent foreground objects relative to background objects can be compared between historic images and current location. Another possibility is to transfer significant corners and edges from the historic image onto a transparent film and view the scene through the transparent trying to overlay the transferred corners and edges with the view. These methods can be also done digital: Using a smartphone or better tablet the historic image and the camera live preview can be overlapped in different combination: simple blending, a checkerboard pattern of historic image and preview or edges of the historic image overlaid onto the preview as shown in this demo.
Image registration
If the rephotograph is not only to be shown next to the historic original but an overlay or animation between the two is desired, the rephotograph has to be aligned perfectly to the historic image - the process of image registration. Albeit this is possible in the darkroom, nowadays this is easier done digitally. For many applications, like creating panoramas, digital image registration is a completely automated process. However, the differences between historic images and rephotograph are so large than only a semi-automatic process is possible - especially if only parts of the images can be registered and the user needs to decide what these parts are.
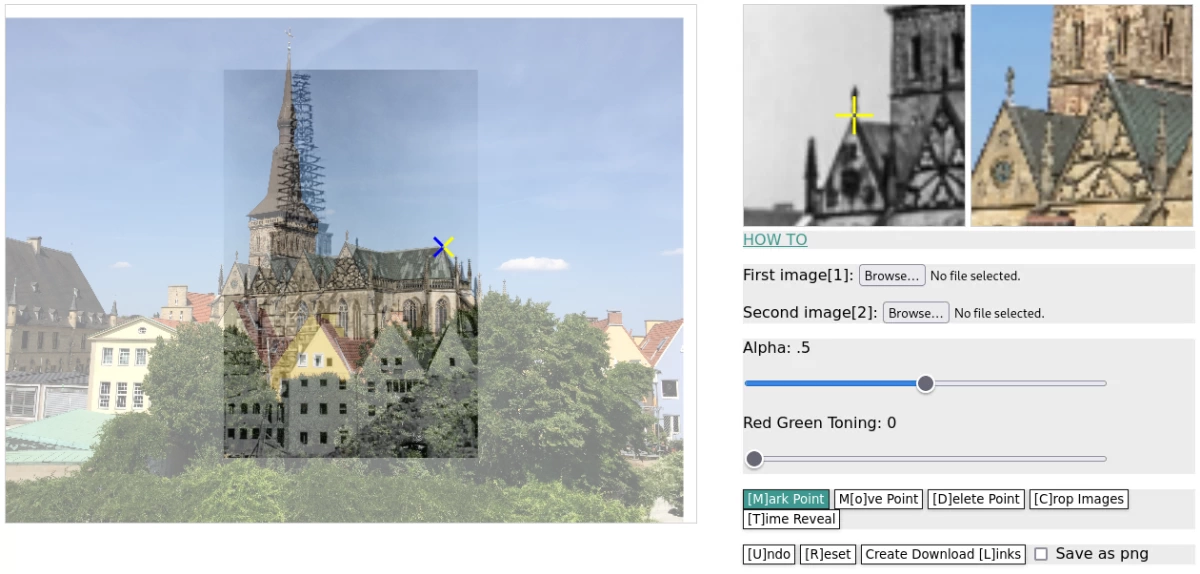
One possible method is the interactive, point based registration, in which user marked points in the historic image and in the rephotograph are aligned. You can test this method as web application in the browser to register your photographs. A how to explains how to use the application.
Visualisation
Besides the classical and static visualisation of the two images next to each other or blended into each other, visualization can also be done interactive or as animation. In the first users move a slider either revealing more of the historic image or the rephotograph which are displayed on top of each other. In the later a gif or video can be used as shown above. These animations can be created with the Rephoto Blender.